
Paine Cosplay Breakdown
Alright! Here's the costume breakdown!
From the top down!
WIG:
✂️I got my wig from Arda Wigs! It's their Cady in Aria Blonde. I still have to go back and take a few wefts out to make it lay correctly and, in general, style it a little more, but I LOVE the color and it's such a great base to work with!

If you wanna know more about contacts, I wrote a blog about them!
Contacts:
👀 Contacts are from Uniqso and they are the i.Fairy Dolly+ Red lenses! I use them for Sheik too!

Photo by WeNeal's Photography and Retouching
Collar:
The collar, as well as most of the costume, I made out of CosplayFabrics.com's Low Stretch Pleather in black, a single snap in the back, and believe it or not- tiny brads that go through only one of the two layers of fabric to make the stud look without actually having any metal directly on my skin!


Necklace:
I wire wrapped the whole dang necklace myself from scratch. I had initially wanted to craft the pendant out of clay, but I was really struggling with it as clay is my enemy, so I chose to do something I knew well instead!
Top/Shirt/Shawl ...Thing:

This was stupid hard for me to figure out and pattern, but with the help of my sewing guru friend, Zenko of Zenko.Akko Cosplay, I was able to piece it together and figure it out. There are 3 main parts to it, are all permanently attached now: the top black part with the cross, the piece underneath covered in tiny 1" metallic squares (covered here in a second), and a strapless black bra that I found for super cheap at forever 21.
I basically ended up drawing out the odd pointed shapes that Paine has on the top shawl, cutting and sewing that, cutting out the middle piece and clipping it into place, and finally attaching the two.
I sewed the red straps directly to the bra, and then tacked the shawl in place on the red straps. This causes the top to actually stay up if I put my arms straight down, as well as keeping everything securely in place. 😅


If anyone is interested, I was planning on recreating the pattern I used and posting it because it messed with my head so much.
I still have to add a snap in to where the middle piece hooks under the top piece to hold it in place correctly, so in the photo below, it's more stretched across my arms then it should be.

Photo by Ham Sandwich Photography
Back to those itty bitty squares!

3D Model of the snaps on the print bed
Predictably Ham designed them in a 3D modeling program called Tinkercad for me. We initially designed 2 parts to each square, a front and a back. These 2 parts would 'snap' together through the fabric, thus holding each piece in place perfectly.
We all thought this was a flawless idea...until it wasn't quite. When we put a bunch of them through the pleather, it wasn't working to keep the perfect grid shape we needed. Due to some misprints, the snaps weren't always strong enough to not just pop off. This was a problem through the competition I entered it in at Colorado Anime Fest where I ended up gluing a bunch of them down at the last second because they were just falling off of me left and right.
Our new solution is to up the quality of the snaps, and instead of having the full 1" square as the backing, just have the 7 millimeter snap setting. This would keep the fabric from pulling off directions and be more secure overall!

Photo by Ninth Circle Cosplay
While we were figuring this out before/after judging, I opted with a different top to wear with Paine, so it would stop being such a ....pain.
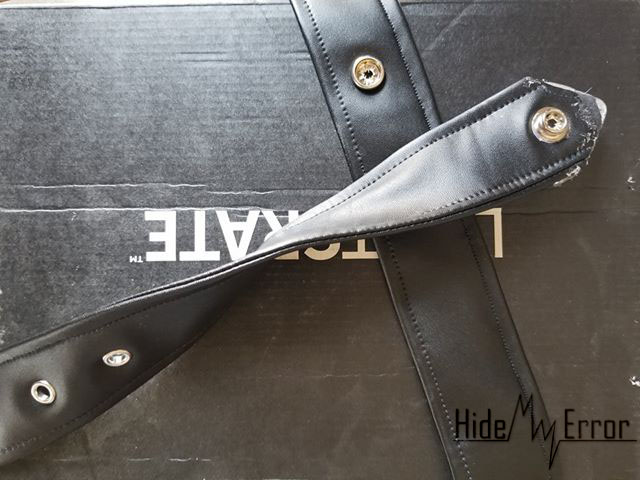
Waist Belts:
I constructed them exactly the same way as the collar, but with grommets instead of brads/studs.

The top belt secures with a fully functional buckle that I made myself. I probably could have found one that fit properly, but I was running out of time so I just made it to fit. The bottom buckle has a snap around the big ring that is masquerading as a grommet, so that one comes off too!


Next up are the red straps that go from my top to my shorts:
These are supposed to act as suspenders for the legging pieces, but doing that would cause some very different shapes with how physics actually works. As you already know, I sewed the red straps in to the top as entirely separate pieces. So as you may have guessed, these pieces across my waist are also separate! I couldn't just sew them in on both ends though or else I wouldn't be able to get in and out of my costume so I decided on using dress clips on the ends of them. Dress clips are most often found on dress pants instead of a zipper in the fly area.
Shorts/Leggings:
I started with a mock-up using sweat-pants material that ended up becoming my lining and they are seriously the most comfortable things ever. Toasty, but comfy. And really that's all I could ask for in a costume 😂
Prior to this project, I had never successfully made pants. I always forget to put the butt in. Every time. This time around I was extremely careful with checking measurements and patterns constantly. I did initially make them as pants, then cut the sides back open as well as made them into the most literal and stylish cut-off shorts ever. This was a lot of slow trial and error. After finishing the basic pants, I had to bring in the sides to make it fit me better as well as adjust the waistband and all that jazz. I think next time, I would definitely bring it in less on the sides than I did. I was really trying to avoid the way it tries to puff out between the buckles.

Original photo by Ze Teny Photography
Pro tip, less is more with fabric. You can always cut more if later, but putting it back after cutting too much off sucks.
That right up there with the giant arrow is exactly what I was trying to avoid. Luckily, I know how to fix it before I wear it again. My solution is to add some stirrups and some elastic. It just stinks knowing that it ended up doing the thing I didn't want it to do because I was too overeager when bringing in the pants. BUT I did learn my lesson and will hopefully always remember what to take my time on with future projects!
Next up is my actual belt with the skull belt buckle:

I had taken a piece of the pleather that comprises the rest of the costume and made a 2" sleeve with it. I then took a 2" cut of that red vinyl and slid it inside of the pleather sleeve. This gave it a really nice weight while still looking exactly like the rest of the costume. I measured the belt out to where it fit well on my waist and added a snap onto the back of the belt tip (which I used resin to make-which I'll cover in a sec too) to hold it in place around my waist.


Since I had just slid the red vinyl into place, adding the grommets helped secure it so it wouldn't twist or slide out. I used E6000 to put the belt tip in place at the end of the belt.
For the buckle, We used a 3D model for Paine's sword designed by Ricardo Salomao (Which is also the sword model we printed). In this really cool model, the skull slots into place on both sides of the pommel, so we took it and crossed it with the Fluer de Lis cross model (which I'll also cover in a second) to make a single piece. We then crafted a small piece to allow it to slide over the belt and glued that to the back.
Concho Belt!
So this was a really interesting piece to make. It's probably my favorite part of this whole costume honestly.
To start, I sculpted one of these things out of clay. As previously mentioned, clay is my enemy and making one of these took me 4-5 hours of struggling. I took a ton of photos during this process, so I'll try to not post all of them here. Maybe I'll make a separate tutorial?
Anyway, here is what the clay piece looked like before I applied real life Copy-Paste techniques. -->
Since the very thought of attempting to create any more of these out of clay sent fear down my spine (since they would have to be the exact same size and shape ), I opted for something else I know pretty well: Resin!


The first thing I had to do was make a mold of my clay piece. I had used some oven bake Sculpey, so I didn't have to wait too long for the piece to be rock-hard. I used Alumilite Amazing Mold Putty to make the mold.
This stuff is super easy to use. You just make little balls of equal size out of each part, one yellow and one white, and them mix them thoroughly. After mixing them and making sure there are no cracks or anything in the mold-ball, you kinda just roll it over what you're making the mold of. I made sure to press it into all the holes and gaps to ensure that when I cast more pieces it would pick up every single detail that I had struggled over for so many hours. After about 10-15 minutes, the mold was cured and I could remove my clay original from it.
Next step was to cast a BUNCH of these. We measured how many I would need based off of where I would want the belt to rest and came to a total of 17 pieces.
The resin I used is Alumilite Amazing Casting Resin. This is a high heat resin that cures in about 10 minutes. You can watch it happen! So I started the process of casting these suckers one at a time.
Naturally, this took a really hecking long time. I ended up making another mold so that I could cast 2 at a time to speed up the process. While this was happening, I was also working on quite a few other pieces. I'll touch on this again later, but in this picture, you can see that I was also casting a bunch of things, including the Fluer de Lis cross and the thigh strap clips.
After casting 17 of these little things, the next step was sealing them, painting them, and weathering them.
I had found this lovely chrome paint that I sprayed every single piece with, then I took black acrylic paint and a paper towel and gently scrubbed the paint into every crack. This helped them all not look like bright, brand-new metal, a technique known as weathering.


Conchos complete! The next step was to attach them to make the belt instead a pile of cool junk :P I took the same red vinyl that I used for the straps and sewed them into almost sleeves, then whip-stitched them to keep the seam behind the now-rope like piece.
To attach the conchos, I used more E6000 (my favorite glue ever) to attach them to the belt, exactly as I wanted them. I had to measure very carefully and often had to try to take the pieces off to reposition them without damaging the red belt piece.


Next up: Thigh Straps!
There's not a lot to these. I used more of the red vinyl to make straps and sewed them in place. They're sewn into the inner layer of the shorts and straight across the top front of the leggings. The seam line is then covered up by the metal piece.
The metal piece was used making the exact same method as the conchos. I crafted one out of clay, made a mold of it, and resin cast it four times. Then I used my trusty E6000 to secure them in place, right where I wanted them on the seams.
Sewing these straps in place instead of actually using clips allows me to not have to worry about them suddenly pupping off at any given time. Usually I'm all for making things as they were intended, but in this costumes case, I instead used it as a method to keep everything on me and in place at all times.
Buckles:

We're almost done! The buckles that I used were ones that I grabbed from a craft store. I modified the ends and added the belt clips, but beyond that, they're pretty much as they were when I purchased them. I was careful when sewing them in place to make sure that they were in the correct position, and ended up using the buckle functionality to tighten them once it was on. So it really worked out! :D

Sword/ Fluer de Lis Cross/ More Resin Info:
Okay! For the last section, I'll quick over these interesting pieces. For the cross, Predictably Ham designed the 3D model for the exact design from scratch. We then printed it to get the physical version. We wanted to play around with it and try something new, so we actually ended up using PH's Vacuform, a machine that can heat up a sheet of plastic and vacuum down to perfectly form to anything on the vacuum bed.
We had a bunch of fun with this and added a bunch of random things to the vacuum bed, including a nickle that I had in my pocket at the time. We experimented using this method to make a mold for the conchos as well as the suspender clips on the thighs, with varying success. Because of all the fine detail in the concho, it didn't go well at all. The first resin pull of it came out wonderfully, but absolutely destroyed the plastic mold in the process. The thigh bit and the cross worked much better and this is the mold I used for both of them!

Here's a photo from left to right of the finished resin cross (weathered), a resin cross that had just been painted, and the original 3D print. Designed by Predictably Ham
Now for the Sword!

As previously mentioned, this sword was designed by Ricardo Salomao who created it for the renowned cosplayer Alyson Tabbitha. It's an incredible model and he has it listed as free to use.
We printed the model as-is. There is room for a dowel in the center, so Predictably Ham had the idea of adding a carbon fiber rod instead. The final result is super sturdy and incredibly light weight. And as a bonus, we crafted it so it can come apart to fit into my luggage!


And that's all I have for you!
If you have any questions that I didn't answer, want some clarification on one of my processes, or want to learn more, I would be more than happy to help!


Art by Kraintz
Thank you so much for reading! I hope you found this helpful!
Thank you to Akko of Zenko.Akko Cosplay for helping me by proof reading this whole dang thing.